

Self tapping screws are a practical fastening solution for thin metal sheets, brackets, ducts, housings, and many metal-to-metal assemblies. They form or cut mating threads as they are driven, reducing the need for separate tapping operations.
To use self tapping screws in metal successfully, select the screw for the metal type and thickness, prepare a correctly sized pilot hole when required, keep the driver perpendicular to the surface, and stop as soon as the joint is secure. Correct selection and installation help prevent stripped threads, damaged screw heads, and loose connections.
What Are Self Tapping Metal Screws?
Self tapping metal screws are fasteners designed to create their own mating thread in a metal workpiece. Depending on the point design, they may require a pre-drilled pilot hole or may drill and tap in one operation.
It is useful to distinguish between two common options:
| Type | Point Design | Pilot Hole Needed? | Typical Use |
|---|---|---|---|
| Thread-forming or thread-cutting self tapping screw | Sharp or cutting point | Usually yes | Pre-punched or pre-drilled sheet metal |
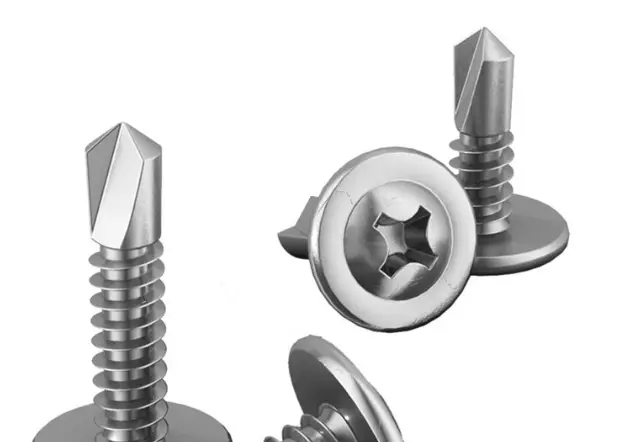
| Self-drilling screw | Drill-point tip | Often no | Metal-to-metal assembly and light-gauge steel |
The term “self tapping” is sometimes used broadly in the market. Always confirm the actual point type, recommended material thickness, drilling capacity, and installation guidance in the product specification before ordering.
Choose the Right Screw Before Installation
A screw that works well in thin galvanized sheet may not be suitable for thicker steel, stainless steel, aluminum, or a structural connection. Before installation, check the following factors.
1. Metal Type and Thickness
Identify the base material first. Thin sheet steel, aluminum, galvanized metal, and stainless steel can behave differently during installation.
For thicker, harder, or high-strength metal, a standard self tapping screw may not create a reliable connection. A pilot hole, a different fastener grade, or another fastening method may be required. For safety-critical, load-bearing, or structural work, use an engineered fastening design rather than relying on general installation guidance.
2. Screw Material and Coating
The screw material should be compatible with the surrounding metal and operating environment.
- Zinc-plated screws can suit many dry indoor applications.
- Corrosion-resistant coatings may be appropriate for humid or exposed environments.
- Stainless steel screws can be useful where corrosion resistance is important, but the screw grade and drilling performance must match the base metal.
- When dissimilar metals are joined, consider the risk of galvanic corrosion and use an appropriate material or isolation method.
3. Head Style and Drive Type
Choose a head style that supports the assembly requirements:
- Hex washer heads provide strong driving control and broad bearing area.
- Pan heads are common for general sheet metal fastening.
- Countersunk heads are useful where a flush surface is required.
- Washer heads or sealing washers may be suitable where load distribution or weather resistance is needed.
Use the correct driver bit or socket size. A poor fit can cause cam-out, round the screw head, and reduce installation efficiency.
4. Screw Length
The screw must pass through the materials being joined while leaving sufficient thread engagement in the receiving metal. Excessive length can interfere with nearby components, wiring, insulation, or moving parts.
Tools You May Need
Prepare the tools before beginning:
- Self tapping metal screws matched to the application
- Drill/driver with adjustable speed and torque
- Correct bit, socket, or driver tip
- Metal drill bit for pilot holes, if required
- Center punch and hammer for accurate hole positioning
- Measuring tape or caliper
- Safety glasses and gloves
- Deburring tool or file, when needed
Wear eye protection when drilling or driving into metal. Metal chips can be sharp and may travel unexpectedly.
Step-by-Step: How to Use Self Tapping Screws in Metal
Step 1: Mark the Fastening Location
Measure and mark the intended screw location. Confirm that the screw will not strike concealed wiring, piping, moving parts, or finished surfaces behind the metal.
For a cleaner and more accurate start, use a center punch to create a small indentation at the marked location. This helps prevent the drill bit from wandering on smooth metal.
Step 2: Clamp and Align the Materials
Position the pieces exactly as they will be fastened. Clamp them securely if possible, especially when joining thin sheet metal. Movement during installation can create misaligned holes, enlarge the opening, or reduce joint quality.
Step 3: Determine Whether a Pilot Hole Is Needed
If you are using a conventional self tapping screw without a drill-point tip, drill or punch a pilot hole first. The pilot-hole diameter should follow the screw supplier’s recommendation for that specific thread design and base material.
Do not assume one pilot-hole size works for every screw. A hole that is too small can increase driving torque and risk screw breakage. A hole that is too large can reduce thread engagement and pull-out resistance.
A self-drilling screw may eliminate the separate pilot-hole step within its rated material thickness. However, hard steel, thick assemblies, weld areas, or difficult surface conditions may still require pre-drilling.
Step 4: Position the Screw Perpendicular to the Metal
Place the screw straight against the metal surface. Keep the drill/driver at approximately 90 degrees to the workpiece unless the assembly design specifically requires another angle.
Starting at an angle can damage the first threads, enlarge the hole, or cause the screw to walk across the surface.
Step 5: Drive at a Controlled Speed
Apply steady forward pressure and use a controlled speed. Let the screw point and thread design do the work.
For self-drilling screws, excessive speed can create heat, wear the drill point, and reduce drilling performance. For self tapping screws installed in pilot holes, excessive torque can strip the newly formed threads or damage the screw head.
Use a clutch-equipped driver where possible. Begin with a moderate torque setting and adjust only as needed.
Step 6: Stop When the Joint Is Secure
Drive the screw until the head seats firmly and the joined materials are secure. Do not overtighten.
Overtightening can:
- Strip threads in thin metal
- Distort sheet metal
- Damage coatings or sealing washers
- Reduce the holding strength of the joint
- Make future removal difficult
If a sealing washer is used, compress it only enough to create the required seal. Excessive compression can damage the washer and reduce long-term performance.
Step 7: Inspect the Finished Fastening
Check each installed screw for:
- Straight alignment
- Fully seated head
- No stripped drive recess
- No cracked or distorted surrounding metal
- No loose joint movement
- No sharp burrs or metal chips left behind
Remove metal debris from the assembly area. Chips can cause scratches, interfere with moving parts, or contribute to corrosion in some applications.
Common Mistakes to Avoid
Using the Wrong Screw for the Metal Thickness
A self tapping screw designed for thin sheet may fail to penetrate or form effective threads in thicker steel. Always compare the product’s drilling and fastening capability with the actual assembly.
Skipping the Pilot Hole When It Is Required
Not every self tapping screw is self-drilling. If the product has no drilling point and the material requires a pilot hole, forcing the screw into solid metal can damage both the screw and the workpiece.
Drilling an Oversized Pilot Hole
An oversized hole reduces thread engagement. The screw may spin freely, pull out under load, or create a loose connection.
Driving Too Fast
High speed creates heat and can shorten the useful life of a drill-point screw. Use a controlled speed, particularly when penetrating metal.
Installing at an Angle
An angled screw may not seat correctly and can reduce holding performance. Keep the driver aligned with the fastening surface.
Overtightening the Screw
Once the head is seated and the joint is stable, stop. Additional torque does not necessarily create a stronger connection.
When Self Tapping Screws May Not Be the Best Choice
Self tapping metal screws are not the answer for every metal joint. Consider another method when the application involves:
- Heavy structural loads
- Repeated disassembly and reassembly
- Very thick or hardened steel
- High vibration
- Critical weatherproofing requirements
- High-temperature service
- Safety-sensitive equipment
Depending on the application, bolts with nuts, machine screws in tapped holes, rivets, welded joints, or engineered fastening systems may be more appropriate.
FAQ About Self Tapping Metal Screws
Do self tapping screws need pilot holes in metal?
Many standard self tapping screws need a pilot hole. Self-drilling screws have a drill-point tip and can often drill their own hole within their rated material thickness. Check the manufacturer’s specification before installation.
Can self tapping metal screws be used in aluminum?
Yes, they can be used in many aluminum applications, provided the screw type, pilot-hole size, length, and material compatibility are suitable. Avoid assuming that a screw selected for steel will provide the same performance in aluminum.
Why does a self tapping screw spin without tightening?
The pilot hole may be too large, the metal may be too thin for adequate thread engagement, the threads may be stripped, or the wrong screw type may have been selected.
Can I remove and reuse a self tapping screw?
Reuse may be possible for a non-critical application if the screw and formed threads remain undamaged. However, repeated removal can weaken the mating threads, particularly in thin sheet metal. Inspect the joint before reinstalling.
Final Thoughts
Using self tapping metal screws correctly starts with matching the fastener to the metal, thickness, environment, and required joint performance. A properly sized pilot hole, correct driving angle, controlled speed, and sensible torque make a major difference in installation quality.
For help selecting self tapping screws for your metal fastening application, material requirements, or custom purchasing needs, contact Wuyang Metal.
Post time: 10-22-2026


